


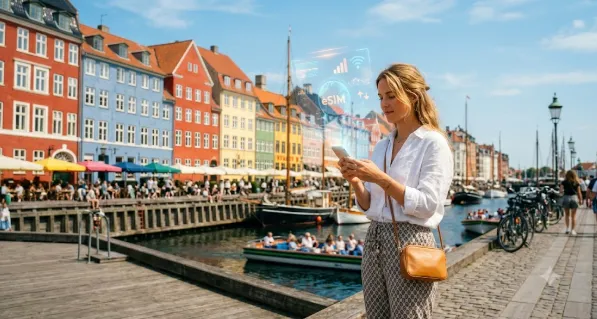
Denmark, a land of enchanting fairy tales, cutting-edge design, and a pervasive sense of ‘hygge’, beckons travelers from around the globe. Whether you’re cycling through Copenhagen’s vibrant streets, exploring ancient Viking history, or marveling at the stunning coastal landscapes, staying connected is no longer a luxury but a necessity. From navigating public transport to sharing postcard-perfect moments with loved ones back home, reliable internet access streamlines every aspect of your trip. Traditional physical SIM cards, with their fiddly installation and potential for hefty roaming charges, are increasingly giving way to a more modern, flexible solution for international travelers: the eSIM. This guide will walk you through everything you need to know about using an eSIM to unlock seamless connectivity during your Danish adventure.
What is an eSIM and Why is it Perfect for Denmark?
An eSIM, or embedded Subscriber Identity Module, is essentially a digital SIM card built directly into your smartphone or other compatible device. Unlike physical SIMs that you insert and remove, an eSIM is activated purely through software. This means no more hunting for local SIM card vendors upon arrival, no more fumbling with tiny trays and pins, and no risk of losing your home SIM card while abroad. For travelers heading to Denmark, an eSIM offers unparalleled convenience. It allows you to maintain your primary number for calls and texts while using a separate data plan for your Danish travels, avoiding exorbitant international roaming fees from your home provider.
The beauty of an eSIM lies in its flexibility. You can purchase and activate a plan before you even leave home, ensuring you land in Copenhagen (or Billund, or Aalborg) with immediate internet access. This is particularly useful for those first crucial hours, whether you need to order a ride, check directions to your accommodation, or simply let family know you’ve arrived safely. Furthermore, many eSIM plans for European destinations offer regional coverage, meaning your data plan might even work across neighboring Nordic or EU countries should your itinerary extend beyond Denmark.
Choosing the Right eSIM Plan for Your Danish Adventure
Selecting the ideal eSIM plan depends largely on your travel style and data consumption habits. Are you a heavy streamer and constant social media user, or do you primarily need data for navigation and occasional communication? Most providers offer a range of data packages, from smaller bundles perfect for a weekend getaway to generous allowances for extended stays. Consider the duration of your trip as well; plans typically range from 7 days to 30 days, with options for longer if needed. Before making a purchase, compare data allowances, validity periods, and pricing. Look for providers that offer clear, upfront pricing without hidden fees. A reputable option like an international eSIM service can simplify your search by offering various plans tailored to different needs and destinations.
It’s also wise to check the network coverage of the eSIM provider’s local partners in Denmark. While major cities like Copenhagen, Aarhus, and Odense generally have excellent 4G and 5G coverage, if your travels take you to more remote islands or rural areas, verifying coverage can save you headaches. Most eSIM providers will specify their partner networks, allowing you to cross-reference with Denmark’s major mobile operators like TDC, Telia, or Telenor.
Activating Your Denmark eSIM: A Step-by-Step Guide
Activating an eSIM is remarkably straightforward, typically taking just a few minutes. Once you’ve purchased your chosen plan, you’ll usually receive a QR code via email. This code holds all the necessary profile information for your eSIM. To activate, ensure your device is connected to Wi-Fi, then follow these general steps:
-
For iPhones: Go to Settings > Cellular > Add eSIM. Choose ‘Use QR Code’ and scan the code you received. Follow the prompts to label your new plan (e.g., ‘Denmark Travel’) and set it as your primary data line.
-
For Android Phones: Navigate to Settings > Network & internet > SIMs (or Mobile network) > Add more. Select ‘Download a SIM instead?’ or ‘Add a SIM’ and scan the QR code.
After scanning, your phone will download and install the eSIM profile. You might need to adjust your device’s cellular settings to ensure data roaming is enabled for your new eSIM plan (without incurring charges from your home SIM). For more detailed instructions and to explore your Denmark eSIM options, it’s always best to consult the provider’s specific guide.
Maximizing Your eSIM Experience in Denmark
Once your eSIM is active, you’re ready to explore Denmark with confidence. Here are a few tips to make the most of your connectivity:
-
Monitor Data Usage: Keep an eye on your data consumption through your phone’s settings or the eSIM provider’s app, if available. This helps prevent unexpected data depletion.
-
Primary vs. Secondary: Remember that your eSIM is primarily for data. You can still use your physical SIM for calls and texts, but be mindful of international roaming rates for these services. Many travelers opt to use VoIP apps like WhatsApp or Messenger for calls over their eSIM data.
-
Troubleshooting: If you encounter any issues, first check that your mobile data is switched on for your eSIM and that data roaming is enabled (if required by your provider, which is common for international eSIMs). Restarting your phone often resolves minor connectivity glitches. Most eSIM providers offer 24/7 customer support via chat or email.
Enjoy the freedom of knowing you can always access maps, translate phrases, or book tickets on the go, without the fear of a massive phone bill upon your return.
Beyond Data: Calls and SMS with an eSIM
While the primary benefit of an international eSIM is often data connectivity, it’s important to understand how calls and SMS fit into the picture. Most travel eSIMs are ‘data-only’, meaning they provide internet access but do not come with a traditional local phone number for making standard calls or sending SMS. For communication beyond data, you have several excellent alternatives:
-
VoIP Apps: As mentioned, apps like WhatsApp, Telegram, Signal, Google Meet, or FaceTime allow you to make voice and video calls, and send messages, all over your eSIM data connection. These are often free and widely used globally, making them ideal for staying in touch with friends and family.
-
Your Home Number: You can still receive calls and texts on your physical SIM’s number. However, making outgoing calls or sending texts will likely incur international roaming charges from your home provider, which can be costly. Ensure you understand these rates before using your home number for anything beyond urgent communication.
-
Local SIM for Calls: For longer stays or if you absolutely need a Danish phone number for local calls, you might consider purchasing a separate physical local SIM specifically for calls and SMS, while still relying on your eSIM for data. This hybrid approach offers maximum flexibility but adds a physical component back into the equation.
For most short-term travelers, relying on data-driven communication apps with a data-only eSIM proves to be the most cost-effective and convenient solution.
Embrace the Future of Travel Connectivity
The days of fumbling with tiny SIM cards and dreading exorbitant roaming charges are quickly fading into the past. eSIM technology represents a significant leap forward for international travel, offering unparalleled ease, flexibility, and cost-effectiveness. By opting for an eSIM for your trip to Denmark, you’re not just buying a data plan; you’re investing in peace of mind. You’re ensuring that from the moment you touch down, you have the power to navigate, communicate, and share your incredible Danish experiences without a hitch. So go ahead, embrace the future of travel connectivity, and let your Denmark adventure begin seamlessly connected.